
This details how to power additional tools using the Adaptive Plugin. This includes UI customizations and event customizations, including how to build carousels using the Adaptive Plugin.
Element Customization
There are three elements that you can change:
- Controller Bar
- Start Next Slate
- End Next Slate
Controller Bar
CSS Selector
div[$id=ib-ctrl]
Selector Description
Selector for the IRIS control bar which encapsulates the IRIS buttons
Example Usage
div[id$=ib-ctrl] { left: 1%; }
This moves the IRIS control bar to the top-left instead of the default top-right
Start Next Slate
CSS Selector
div[id$=start-next-slate]
Selector Description
Start UpNext Location
Selector for the beginning Up Next feature. Allows you to place the Up-Next popout where you would like on the page. At this time, IRIS only supports position changes to the UpNext UI.
Example Usage
div[id$=start-next-slate] { left: 1%; }
This moves the IRIS Up Next popout to the bottom-left instead of the default bottom-right. This can be useful when dealing with logos and branding within media assets.
End Next Slate
CSS Selector
div[id$=end-next-slate]
Selector Description
End UpNext Location
Selector for the end Up Next feature. Allows you to place the Up-Next popout where you would like on the page. At this time, IRIS only supports position changes to the UpNext UI.
Example Usage
div[id$=end-next-slate] { left: 1%; }
This moves the IRIS Up Next popout to the bottom-left instead of the default bottom-right.
Event Customization
The IRIS Adaptive Plugin uses internal events to assess player start and end. If you would like to override these events please follow the instructions below.
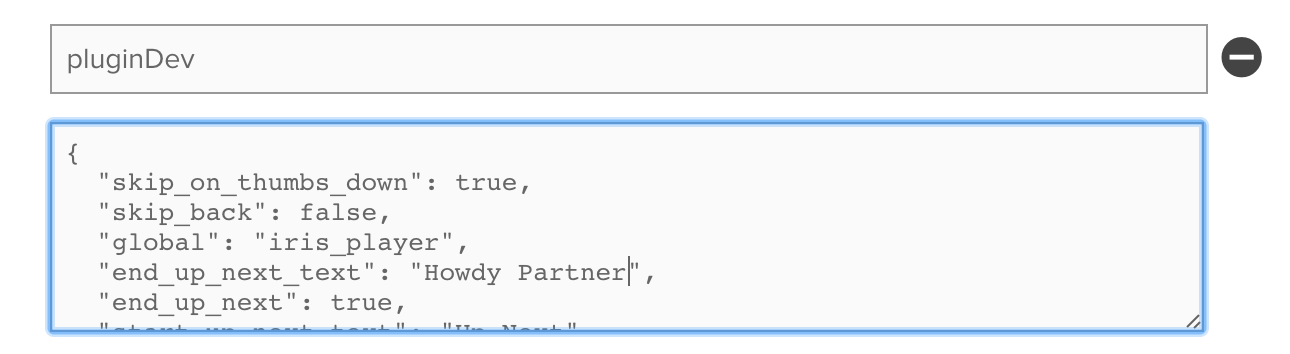
- Set the "global: 'irisPlayer'" param in the IRIS player configuration.
-
Register function with the IRIS plugin. This is done with the .registerEvent(EVENTNAME) function.
- Add a callback to your custom event that emits the IRIS event. Ex: IrisEngine.emit("PLAYING")
If you would like to use the IRIS Plugin's custom "thumb" functionality we offer two events THUMBS_UP and THUMBS_DOWN for your convenience. These events only require emission, not registration with the IRIS plugin.
There are six events you can customize:
- PLAYING
- ENDED
- THUMBS_UP
- THUMBS_DOWN
- SKIP_FORWARD
- SKIP_BACK
PLAYING
Start of video playback.
Example
// Register the event "IRIS_PLAYING" with the IRIS Plugin. This tells the plugin to listen for a custom "PLAYING" event.
   IrisEngine.registerEvent("IRIS_PLAYING");

// Add an event listener to your own event that emits the IRIS event.
   myPlayer.on("playing", function(){
      IrisEngine.emit("PLAYING");
    });
ENDED
End of video playback. Note that this is different from "pause" in that it only fires on video completion.
Example
// Register the event "ENDED" with the IRIS Plugin. This tells the plugin to listen for a custom "ENDED" event.
  IrisEngine.registerEvent("ENDED");


// Add an event listener to your own event to emit the IRIS event.
  myPlayer.on("ended", function(){
    // The additional data is passed in to tell the IRIS Plugin that this particular event was thrown after the user watched to the end of the video (as opposed to a skip)
    IrisEngine.emit("ENDED", {type: "next_auto", percentageWatched: (currentTime() / currentDuration()).toFixed(2)});
  });
THUMBS_UP
Thumbs up will keep playing the current video and calculate new recommendations based off of the user input.
Example
In the HTML, you will have a custom button, styled as you would like:
<button class="yourIcon" id="custom_thumbs_up_button"> Thumbs Up </button>
Then in the JavaScript, add a click listener that emits the IRIS "THUMBS_UP" event:
document.getElementById('custom_thumbs_up_button').addEventListener('click', function(){
   IrisEngine.emit("THUMBS_UP");
 })
THUMBS_DOWN
Thumbs down will automatically skip to the next video in the playlist and calculate new recommendations based off of the user input.
Example
In the HTML, you will have a custom button, styled as you would like:
<button class="yourIcon" id="custom_thumbs_down_button"> Thumbs Down </button>
Then in the JavaScript, add a click listener that emits the IRIS "THUMBS_DOWN" event:
document.getElementById('custom_thumbs_down_button').addEventListener('click', function(){
     IrisEngine.emit("THUMBS_DOWN");
   })
SKIP_FORWARD
Skip forward will skip to the next recommended video in the current recommendation set.
Example
In the HTML, you will have a custom button, styled as you would like:
<button class="yourIcon" id="custom_skip_forward_button"> Skip Forward </button>
Then in the JavaScript, add a click listener that emits the IRIS "SKIP_FORWARD" event:
document.getElementById('custom_skip_forward_button').addEventListener('click', function(){
      IrisEngine.emit("SKIP_FORWARD");
    })
SKIP_BACK
Skip back will skip to the previous video in the current recommendation set.
Example
In the HTML, you will have a custom button, styled as you would like:
<button class="yourIcon" id="custom_skip_back_button"> Skip Forward </button>
Then in the JavaScript, add a click listener that emits the IRIS "SKIP_BACK" event:
document.getElementById('custom_skip_back_button').addEventListener('click', function(){
      IrisEngine.emit("SKIP_BACK");
    })
Replacing Thumbs Up and Thumbs Down Buttons
- Turn off IRIS thumbs by adding thumbs_up: false, and thumbs_down: false to the IRIS player configuration. This will remove the IRIS thumbs from the control bar.
- Add your custom thumb icons to the HTML
- Add a global instance of your plugin by adding the "global: 'irisPlayer'" param to the IRIS player configuration.
- Details on how to use the global plugin option on multi-player pages is in the header IRIS.TV Global Parameters with multi-player pages
- Listen for the player.ready() event or another event that fires after the player is instantiated
- add callback to ready event that adds the "click" handler and emits the IRIS event.
Note: if the "ready" event has already been fired, it will not be fired again.
Example
Once you have implemented Steps 1-3, Step 4 would be formatted similar to this:
videojs('myPlayer').ready(function(){
  var customThumbsUp = document.getElementById("YOUR_CUSTOM_THUMBS_UP_BUTTON");
  customThumbsUp.addEventListener('click', function(){
    irisPlayer.emit("THUMBS_UP");
  })

});
Note: the "irisPlayer" variable must match the string specified in the "global" configuration param.
Hiding the IRIS Buttons during Ads
To alert the IRIS buttons to hide at ad start and re-enable at the end of ads, using the following code.
Note: the "irisPlayer" variable must match the string specified in the "global" configuration param.
1. Add an event listener to the player listening to the event corresponding with the start of ad playback. Then, fire the ad-start event in the callback:
player.addEventListener("ad-start", function(){
    irisPlayer.emit("AD_START");
}
2. Also create an event listener for ad-end. Fire the ad-end event in the callback:
player.addEventListener("ad-end", function(){
    irisPlayer.emit("AD_END", true); // the 2nd argument assesses whether to show the IRIS buttons or not
}
How to Create Custom Hover State for IRIS Buttons
This will allow you to control when IRIS buttons are in a hover state.
Note: the "irisPlayer" variable must match the string specified in the "global" configuration param.
- Get the HTML player element and listen for the mouseover event to listen for user activity. As a callback, emit the "USER_ACTIVITY" event to alert IRIS's plugin to display the buttons.
- Ad "clearTimeout" to hide the the buttons if no user activity is present.
Example
document.getElementById(player_id).addEventListener('mouseover', function(){
  clearTimeout(this.getAttribute('timeoutId'));
  IrisEngine.emit("USER_ACTIVITY");
});
3. Set an additional event listener for when the user's mouse leaves the video_player element.
4. This timeout is used as a buffer from when the user leaves the element and when the controls actually disappear. This makes for a better user experience. Please change the timeout amount to increase or decrease the time between mouseout and hiding the buttons.
Example
document.getElementById(player_id).addEventListener('mouseout', function(){
  var hoverElement = this;
  var timeoutId = setTimeout(function(){IrisEngine.emit('USER_INACTIVE')}, 400);
  hoverElement.setAttribute('timeoutId', timeoutId); //set the timeoutId, allowing us to clear the timeout
});
Accessing the IRIS.TV Playlist
To access the playlist, you must first set the global variable in the options object before you initialize the plugin
You can then access the iris player object globally using the “iris” variable. To view the playlist use the .getPlaylist() to see a list of Iris recommendations. Keep in mind that this playlist may be changed for various reasons, but .getPlaylist() will give you a current playlist in the video.
Example
var irisOptions = { global: “iris” }

initializeIrisPlugin(irisOptions);

var currentPlaylist = iris.getPlaylist();
How to access the current index in the playlist
Repeat the above steps using the .getCurrentIndex() function instead of the .getPlaylist() function.
var irisOptions = { global: “iris” }

initializeIrisPlugin(irisOptions)

var currentIndex = iris.getCurrentIndex();
BONUS: combine the two examples to get the current video in the playlist.
var currentVideo = currentPlaylist[currentIndex];

// and

var nextVideo = currentPlaylist[currentIndex + 1];
Constructing a right rail powered by IRIS.TV
Using the `var currentPlaylist = iris.getPlaylist();` example above, you can retrieve metadata about the playlist and videos that will help you populate a right-rail. Follow the steps below as an example:
1. Get the current playlist.
var irisOptions = { global: "iris" }

initializeIrisPlugin(irisOptions)

var currentPlaylist = iris.getPlaylist();
2. Update the HTML elements with the playlist information.
/////////////////////////////////////////////
//           EXAMPLE HTML DIVS             //
/////////////////////////////////////////////
// <div class="right-rail">
//    <h3 class="title"></h3>
//    <div class="thumbnail"></div>
// </div>

/////////////////////////////////////////////
//           EXAMPLE JAVASCRIPT            //
/////////////////////////////////////////////

function updateRightRail(){
 // loop through playlist and push information onto HTML
 for (var i = 0; i <= currentPlaylist.length - 1; i++) {

    var asset = currentPlaylist[i + 1];

    // update innerHTML of .title, .image_url

    var rightRailDiv = document.getElementsByClassName('right-rail-div')[i];
    rightRailDiv.getElementsByClassName("title")[0].innerHTML = asset.title;
    rightRailDiv.getElementsByClassName("thumbnail")[0].innerHTML = "<img src='" + asset.image_url +"'/>";

    // recommended: set attribute to keep track of playlist index
    rightRailDiv.setAttribute("data-iris-index", i + 1)

    // set event listener to play the right rail video on "click"
    // use the "skipToIndex" function to skip to the desired video in the playlist
    rightRailDiv.addEventListener("click", function(){ iris.skipToIndex(i+1) })

 }
}
3. BONUS: Create callback to watch call that will update the Right Rail as soon as recommendations are retrieved.
iris.addCallback.watch(updateRightRail)
NOTE: This code is intended as an example to be modified in order to work with your own implementation. Additionally, there are many ways to implement a Right Rail using the Adaptive Plugin environment, please use this as a guideline
Adaptive carousel/right rail/video wall example
Make sure to set global variable in options
var irisOptions = { global: "iris_player" }
/////////////////////////////////////////////
//           EXAMPLE HTML DIVS             //
/////////////////////////////////////////////
//  <div id="right-rail_container" class="right-rail-container" style="float:right; position:absolute; right:0px; top:0px;">
//  </div>

/////////////////////////////////////////////
//           EXAMPLE JAVASCRIPT            //
/////////////////////////////////////////////
function updateRightRail(playerID) {
   var rightRailContainerWrapper=document.getElementById('right-rail_container');

rightRailContainerWrapper.innerHTML = "";
var currentPlaylist=iris_player.getPlaylist().slice(iris_player.getCurrentIndex());console.log(currentPlaylist);
  for(var i=0;i<currentPlaylist.length-1;i++){var asset=currentPlaylist[i+1];
  var rightRailDivWrapper=document.createElement("div");
  rightRailDivWrapper.className="iris-right-rail";rightRailDivWrapper.innerHTML='<div class="thumbnail" ></div><div class="iris-title"></div>';  rightRailContainerWrapper.appendChild(rightRailDivWrapper);
   var rightRailDiv=rightRailContainerWrapper.getElementsByClassName("iris-right-rail")[I];
     if(rightRailDiv){rightRailDiv.getElementsByClassName("iris-title")[0].innerHTML=asset.title;rightRailDiv.getElementsByClassName("thumbnail")[0].innerHTML="<img src='"+asset.image_url+"'/>";rightRailDiv.setAttribute("data-iris-index",i+1);rightRailDiv.addEventListener("click",function() {iris_player.skipToIndex(parseInt(this.attributes["data-iris-index"].value))}) }}
}

// Check Iris global variable exists then add callback to populate carousel when Iris watch/next call are sent
var checkIris = window.setInterval(function(){
        if (window.iris_player != undefined) {
            window.clearInterval(checkIris);
            console.log("Iris plugin initialized");
            iris_player.addCallback.watch(updateRightRail);
            iris_player.addCallback.next(updateRightRail)
        }
    }, 1000);
When a user clicks on thumbs up/down or the player runs out of assets, an Iris next call will be made. This will update the internal Iris playlist by adding to the existing playlist.
It is recommended to add a callback for the next call to update the Iris playlist and right rail/carousel items. The following snippet is from the example above.
iris_player.addCallback.next(updateRightRail)
NOTE: Make sure to use parseInt() when using custom code to add to an index or using skipToIndex()
nextVideoIndex = parseInt(currentVideoIndex) + 1;
iris_player.skipToIndex(parseInt(irisIndex));
NOTE: You can also create additional code to hide the right rail/carousel during ad play, in order to prevent a user from clicking on another video.
Here is an example to hide the DIV for Brightcove player:
//rightrail must be hidden during ad play to prevent user from clicking on another video
   videojs(playerID).on('ads-ad-started',function(){
       rightRailContainerWrapper.style.display = "none"
   });
 videojs(playerID).on('ads-ad-ended',function(){
     rightRailContainerWrapper.style.display = "block"
   });
Brightcove-Adaptive Example
Use that global variable to access the playlist information in step 2 and 3. In the example, the global variable is "iris_player" meaning the JS would be implemented as such:
var currentPlaylist = iris_player.getPlaylist();
/////////////////////////////////////////////
//           EXAMPLE HTML DIVS             //
/////////////////////////////////////////////
// <div class="right-rail">
//    <h3 class="title"></h3>
//    <div class="thumbnail"></div>
// </div>

/////////////////////////////////////////////
//           EXAMPLE JAVASCRIPT            //
/////////////////////////////////////////////

function updateRightRail(){
 // loop through playlist and push information onto HTML
 for (var i = 0; i <= currentPlaylist.length - 1; i++) {

    var asset = currentPlaylist[i + 1];

    // update innerHTML of .title, .image_url

    var rightRailDiv = document.getElementsByClassName('right-rail-div')[i];
    rightRailDiv.getElementsByClassName("title")[0].innerHTML = asset.title;
    rightRailDiv.getElementsByClassName("thumbnail")[0].innerHTML = "<img src='" + asset.image_url +"'/>";

    // recommended: set attribute to keep track of playlist index
    rightRailDiv.setAttribute("data-iris-index", i + 1)

    // set event listener to play the right rail video on "click"
    // use the "skipToIndex" function to skip to the desired video in the playlist
    rightRailDiv.addEventListener("click", function(){ iris_player.skipToIndex(i+1) })

 }
}
iris_player.addCallback.watch(updateRightRail)
Changing the style of the IRIS.TV buttons
The selector for all IRIS icons is:
.irisIcon:before
Example
.irisIcon:before {
    font-size: 28px !important;
}
The above will modify the icons to have a font-size of 28px. Depending on where this CSS is placed on the page, the "!important" modifier may or may not be necessary.
Can I change the style of the CSS?
Yes. This is the most specific selector for the IRIS UpNext slates. This particular example will move the slates higher on the video player. Again, depending on where this is on the page, the "!important" modifier may or may not be necessary.
Example
#upNext.up-next-container .iris-upnext, #upNext.up-next-container div[id$=end-next-slate].iris-upnext, #upNext.up-next-container div[id$=start-next-slate].iris-upnext{
    bottom:6em !important;
}
Updating the icons (With an example)
Icons can be updated by using your custom font, font-awesome will be used for the sample purpose:
<!-- Adding your custom font -->
<link rel="stylesheet" href="https://stackpath.bootstrapcdn.com/font-awesome/4.7.0/css/font-awesome.min.css">
/* Plain CSS */

div.irisIcon:before {
  font-family: 'FontAwesome';
}

div.iris-skipForward:before {
  content: "\f061";
}

div.iris-skipBackward:before {
  content: "\f060";
}

div.iris-thumbsUp:before {
  content: "\f164";
}

div.iris-thumbsDown:before {
  content: "\f165";
}
As for updating the font on the upNext font family and size:
.up-next-container .iris-upnext {
  font-size: 20px !important;
  font-family: Arial !important;
}
UpNext Customizations
Why isn't the UpNext widget showing?
This could be for many reasons, but there are a few common reasons that you can check for before escalating the issue.
1. Are there invalid assets in the playlist?
This can be checked by quickly looking in the developer console (right click in the Chrome browser and select "Inspect" to open the developer tools, then click "Console" to view the console) for 404, or 403 errors. 404 and 403 errors (especially from http://edge.brightcove.com... links) are a key indicator that the asset is either geoblocked, deleted, or in someway un-viewable by the user. The UpNext will not display if the next video in the playlist is an invalid asset.

2. Is it configured properly?
This can also be viewed in the developer console by selecting the "Elements" tab of the Developer Console and searching for "end-up-next" and "start-up-next." If the HTML elements for the UpNext widget are not in the DOM, then there is a high chance that the client has not configured the "start_up_next" and "end_up_next" configuration parameters.
IRIS.TV with multi-player pages
When clients use the global parameter plugin option and have multiple players on a single page, they should avoid use the same hardcoded global parameter for each player. An example of this would be each player containing the same plugin option `"global":"iris"`.
There are two ways to solve this issue:
- Using the "ByEid" iris functionality.
- Dynamically creating individual global parameters for each player.
Using the "ByEid" iris Functionality
Note: This works for the "getPlaylist", "getCurrentIndex", and "skipToIndex" functions. It can only be used if ALL players have the same global parameter.
The IRIS.TV Adaptive Library assigns an eID for each IRIS.TV-enabled player on a page. Here's how to use these IDs to populate and modify carousels:
1. Expose the eID for each IRIS.TV-enabled player
Query for the eID with
window.irisInstances
An example of that function's response:
0: Object { id: "myPlayer", eid: "gXKM" }
1: Object { id: "myPlayer2", eid: "iAxr" }
length: 2
2. Specify the eID for carousel and right-rail functions
Format the "getPlaylist", "getCurrentIndex", and "skipToIndex" to use specific IDs. Following is an example of each using an eID from above:
iris.getPlaylistByEid("gXKM")
iris.getCurrentIndexByEid("gXKM")
iris.skipToIndexByEid("gXKM",4)
For "skipToIndexByEid", please specify the Index Number.
The responses will have the same function and format as the "getPlaylist", "getCurrentIndex", and "skipToIndex".
Specifying Players with Dynamic, Individual Global Parameters for Each Player
Clients can also create dynamic global parameters for each player on the page. That way they can reference individual players using the different global parameters. Here’s an example using the getPlaylist functionality for two players:
///Player One
var irisOptions = { global: “iris8445312” }

initializeIrisPlugin(irisOptions);

var currentPlaylist = iris8445312.getPlaylist();

///Player Two
var irisOptions = { global: “iris8445323” }

initializeIrisPlugin(irisOptions);

var currentPlaylist = iris8445323.getPlaylist();
Building Carousel Recommendations using the Adaptive Plugin
Editing the plugin.js file
Like other customizations for the Adaptive Plugin, it's required to make changes to the plugin.js file that holds any player-specific requirements. Documentation for how to set that up can be found in the Custom Adaptive Plugin documentation.
The two following changes to the plugin.js file are required for "carousel_recs":
1. Add" "carousel_recs":true to the "options" section. Here's an example of that option added to existing plugin settings:settings: {
client_token: alj9890an,
platform: videojs,
carousel_recs:true,
ssl: true,
platform_id: 4651213,
player_id: player_9810,
start_up_next: true,
start_up_next_text: "UP NEXT:",
end_up_next: true,
end_up_next_text: "UP NEXT:",
},
2. Add the following code to that same plugin.js file:
IrisEngine.addCallback.watch(function(data) {
            if (options.settings.carousel_recs) {
                var iris_watch = new CustomEvent('iris_watch', {
                    detail: data
                });
                window.dispatchEvent(iris_watch);
            }
        });

        IrisEngine.addCallback.next(function(data) {
            if (options.settings.carousel_recs) {
                var iris_next = new CustomEvent('iris_next', {
                    detail: data
                });
                window.dispatchEvent(iris_next);
            }
        });
Pulling Recommendations and Updating the Carousel
Once the code is implemented in the plugin.js file, the client should then code to their page to populate recommendation updates to the carousel. Here's an example of that code:
window.addEventListener('iris_watch', function (e) {
            updateCarousel("myPlayer", e.detail);
        });

        window.addEventListener('iris_next', function (e) {
            updateCarousel("myPlayer", e.detail);
        });